
Haul'n Off project guide
10 Small Dumpster Tips for a Smoother Yard Cleanup
A ten-point operational checklist focused on preparation, access, safe loading, material control, and pickup readiness for yard work.
Step 01
Tips 1 and 2: define the job and sort first
Tip 1 is to draw a clear cleanup boundary. List the beds, fence lines, shed areas, patio edges, or storm debris included in the job. A boundary prevents unrelated garage items and household junk from expanding the load after the container is selected. Photograph the areas so you can compare the plan with the finished yard.
Tip 2 is to sort before sizing. Make separate piles for approved general debris, reusable material, concrete or soil, and restricted items. Haul’n Off limits concrete, dirt, and asphalt to the 10-yard lowboy. The smallest listed general-debris size is 15 yards, and its fit should be based on the sorted pile rather than the size of the yard.
- 1. Set the cleanup boundary.
- 2. Separate material streams.
Step 02
Tips 3 and 4: measure the pile and name dense debris
Tip 3 is to measure each approved pile at its widest and highest points, then estimate an average rather than using the tallest branch. Note whether material will remain loose or be cut and bundled. Include photos and recognizable scale. This gives the provider more useful information than a guess such as “one backyard of brush.”
Tip 4 is to identify density. Wet organic material, soil stuck to roots, pavers, rocks, old roofing, plaster, and tile can add substantial weight. Knock loose soil from plant roots and keep heavy material separate. Tell the provider the exact dense material before booking; an approved clean load may use the lowboy, and the written quote controls what is approved. Never choose a larger general-debris container as a workaround.
- 3. Measure and photograph debris piles.
- 4. Call out dense material.
Step 03
Tips 5 and 6: measure access and prepare the site
Tip 5 is to measure the placement pad, container door area, and full truck approach. Check gate width, turns, parked vehicles, roof edges, wires, trees, slopes, soft soil, drains, and irrigation covers. Do not assume that a container fitting on the ground means the delivery truck can reach it.
Tip 6 is to prepare before delivery. Move vehicles, hoses, toys, tools, and staged debris out of the route. Tell household members which area must remain clear. Get owner approval for private placement. If public space is under consideration, check current local requirements rather than relying on a neighbor’s past setup.
- 5. Measure the entire access route.
- 6. Clear and protect the placement zone.
Step 04
Tips 7 and 8: cut safely and load in layers
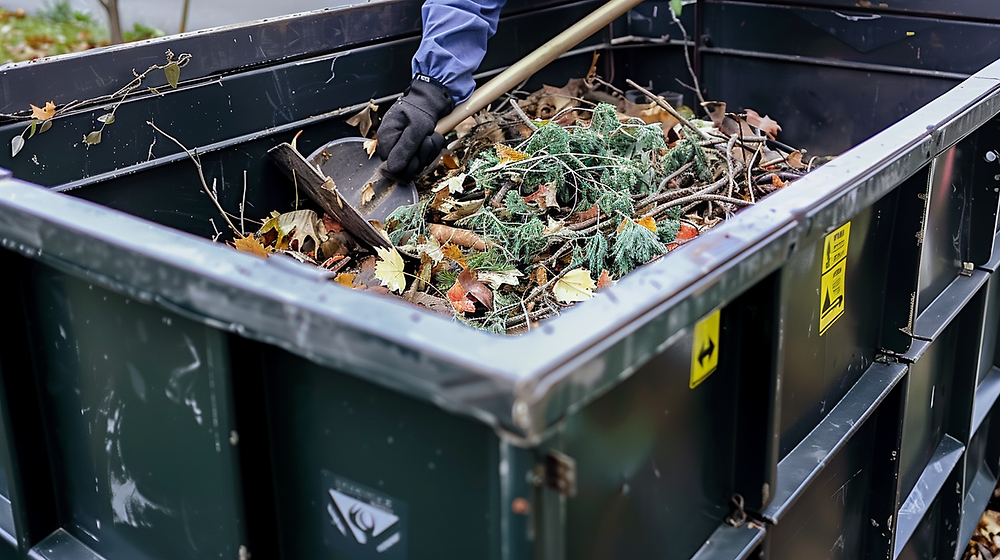
Tip 7 is to reduce approved bulky debris only with safe tools and methods. Cut branches into manageable lengths, flatten empty boxes, and take apart simple untreated wood structures when you know how. Wear suitable protective gear. Do not burn material, crush it with a vehicle, or climb into a container.
Tip 8 is to load stable layers. Place flat pieces low, distribute weight across the floor, and fill safe gaps with smaller approved debris. Keep the door usable until bulky pieces are inside, then secure it according to instructions. Nothing should protrude from the sides or rise above the fill line.
- 7. Break down approved items safely.
- 8. Distribute the load and stay level.
Step 05
Tip 9: control what enters the container
Assign one person to check uncertain items. Hazardous waste, paint and liquids, batteries, propane, tires, e-waste, medical waste, and asbestos are prohibited. Appliances require prior approval and cost $75 per appliance. Outdoor cleanup can uncover chemicals, fuel cans, pool products, batteries, old electronics, and vehicle parts, so a gatekeeper matters.
Keep restricted items in a secure, labeled place away from children, pets, drains, heat, and the dumpster while you arrange an appropriate handling option. Do not open unknown containers or combine liquids. If material may contain asbestos or another hazard, stop disturbing it and seek qualified guidance.
- 9. Use a load gatekeeper and hold uncertain items aside.
Step 06
Tip 10: finish for a clean pickup
Tip 10 is to inspect the container and route before requesting pickup. Confirm the load is below the top edge, the door is secured, and no branches or wire stick out. Remove tools and vehicles from the approach. Sweep loose debris around the box without pushing unknown material underneath it.
Take final photos of the load and access area, then use the confirmed pickup process. Keep the route open until removal is complete. Afterward, compare the measured piles with actual capacity and record anything that surprised you. Those notes make the next seasonal cleanup faster to estimate.
- 10. Inspect, document, and clear the pickup route.
Step 07
Turn the ten tips into a one-page work plan
Write the cleanup boundary, four staging labels, pile measurements, selected placement area, and truck route on one page. Add the name of the person checking materials and the confirmed process for pickup. Give a copy or photo to every helper before work starts. A short shared plan is more effective than expecting people to remember instructions while carrying branches, dismantling fencing, or moving bulky outdoor items.
Use three pause points: after sorting, when the first section is loaded, and before the final pickup request. At each point, check material type, load height, route clearance, and remaining pile volume. If any part no longer matches the plan, stop and update it. These checks connect the ten tips into a workflow and make it less likely that speed, fatigue, or a late-added cleanup area will create an unsafe or unsuitable load.
Project questions
Frequently asked questions
What is the first step in a yard dumpster cleanup?
Define the exact cleanup area and sort material before choosing a size. This keeps unrelated items and heavy debris from changing the load later.
Can soil and branches share a general-debris dumpster?
Do not mix them. Dirt, concrete, and asphalt must use the 10-yard lowboy, while approved general debris uses the standard container category.
How do I make branches take less room?
Cut and bundle approved branches into manageable lengths with proper tools and protective gear. Never jump on the load, climb inside, burn material, or crush it with a vehicle.
What yard items are prohibited?
Hazardous waste, paint and liquids, batteries, propane, tires, e-waste, medical waste, and asbestos are prohibited. Appliances require prior approval and cost $75 per appliance.
What should I check before pickup?
Keep debris below the fill line, remove protrusions, secure the door as directed, clear the truck route, remove tools and vehicles, and photograph the final condition.
Keep planning
Helpful next steps
This page keeps the original article URL and publication date. Prices shown on Haul'n Off pages come from our current rate list. Ask for a written quote with the terms for your job.